 NOVA STUDIOS


- About Diplocaulus
- What is in the Diplocaulus skeleton STL download
- Printer size you need
- Printing the Diplocaulus skeleton STL
- Assembly and the base
- Questions people ask
- Licence
About Diplocaulus
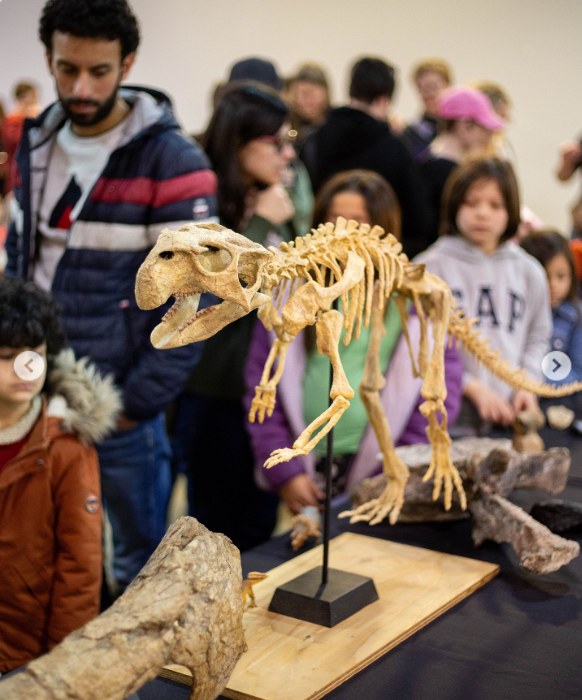
This Diplocaulus skeleton STL builds my reconstruction of the amphibian with the boomerang-shaped head. It is walking: the right front foot and the left hind foot are on the ground, the other two are lifted, and the long flat tail curves away behind the hips. The skull is 322 mm across the tips of the horns.
Diplocaulus magnicornis was named by Edward Drinker Cope in 1882. It is a nectridean, one of the lepospondyl amphibians, and its bones come from the Early Permian red beds of Texas and Oklahoma. Young animals had a skull with a smoothly rounded back edge. The horns grew out as the animal got older.
Nobody knows for sure what the horns were for. Cruickshank and Skews suggested in 1980 that the head worked like a hydrofoil in the water. Others have seen it as a counterweight for the heavy front of the head, a weapon in fights between rivals, or a shield for the gills. The Wikipedia page gives a short overview of the ideas.

I built the Diplocaulus skeleton STL in Blender. Where the fossils leave a question open, so does the model: no complete Diplocaulus tail has been described, so the length of the tail is my reconstruction.
What is in the Diplocaulus skeleton STL download
- 17 STL parts: the skull in four parts (the snout with the orbits and the lower jaw, the skull table with the parietals and the back of the skull, and the left and right horn), the pectoral girdle, the presacral vertebrae with their ribs in three sections, the pelvic girdle, the four limbs, and the tail in four sections
- About 1.23 m from the snout to the tip of the tail, measured along the body, 322 mm across the horns and about 98 mm tall above the board
- Channels for the 4 mm steel pins already in the parts, and printed pegs for the limbs and the tail
- A 25-page assembly manual (PDF) with a render for every step, the cut lengths for the steel and the hole positions for the base
- Files in millimetres, ready to print at 100 %

Printer size you need
The Diplocaulus skeleton STL prints in parts, so your printer only has to fit the biggest one. That is the middle section of the tail at 319 mm. Every other part is under 206 mm.
On a 10-inch resin printer with about 220 mm of build height, every part fits except that tail section, and the two front sections of the ribcage only fit standing up. A 14-inch class machine of about 277 × 156 × 300 mm takes the tail section at an angle, and a 300 × 300 mm FDM bed takes it lying diagonally. Check the long parts in your slicer before you start.
Printing the Diplocaulus skeleton STL
The Diplocaulus skeleton STL comes without supports. That is on purpose: where supports go depends on your printer, your resin and how you orient each part, so that call is yours. Keep them off the joint faces and out of the pin holes, because a support inside a hole closes it.
The four skull parts are solid and heavy. Hollow them in your slicer with 2.5 to 3 mm walls and put the drain holes in the palate, not in the roof of the skull, so the ornament on top stays clean. On resin use a 0.03 to 0.05 mm layer height and tilt the parts 20 to 30 degrees. On FDM, a 0.2 mm nozzle keeps the ribs, the claws and the tail tip sharp.
The finest points, the claw tips, the ends of the ribs and the spines along the tail, are thinner than 1 mm in places. At 100 % that is no problem. Before you print the whole kit, print the middle ribcage section and check that a 4 mm pin slides into its channels.

Assembly and the base
The Diplocaulus skeleton STL goes together in sections. The four skull parts glue into one skull. The three ribcage sections join behind each other, the pectoral girdle goes under the front section and the pelvic girdle under the last one. The limbs go onto the girdles, the trunk goes onto the base, the tail follows in four sections, and the skull goes on last.
Three 4 mm steel pins hold the skull on the atlas and join the three ribcage sections. The limbs and the tail sections plug in on short pegs that are printed on the parts. The skeleton stands on its own. In my photos it stands on a dark board of 1020 × 520 mm with three thin 3 mm steel supports under the chest, the pelvis and the tail, the way a museum would mount it. The supports are optional, and the manual gives the cut lengths and the hole positions if you want them. The board and the steel are not included.
For the Diplocaulus skeleton STL you supply about 130 mm of 4 mm steel rod for the three pins, about 125 mm of 3 mm rod if you want the supports, two-part epoxy for the joints that carry weight, and medium CA glue for the limbs and the tail sections. Building it is an evening or two of work, plus the time the epoxy needs to cure. Dry-fit every joint before you glue it.
If you like this kind of animal, the Beelzebufo skeleton is another amphibian in the shop, and the rest of my 3D printed skeleton files are on the STL page.

Questions people ask
Can I print the Diplocaulus skeleton STL smaller or bigger?
Yes, as long as you scale every part by the same factor. The pin channels scale with it: at 80 % the 4.2 mm channels become 3.4 mm, so you would switch to 3 mm rod. From half size down, the ribs, the tail tip and the pin joints become the weak points, so use a tougher resin there.
Do I need the supports?
No. The skeleton stands on its own. The three thin supports in my photos are a display choice, the way a museum would mount it. You do need the three 4 mm pins: they hold the skull on the atlas and keep the backbone in line.
Is the skull one piece?
No. The skull of the Diplocaulus skeleton STL prints in four parts so it fits on a normal printer, and the parts glue together into the full boomerang shape.
Why is the head that wide?
The width comes from two long bones at the back of the skull, the tabulars, that grow out into horns. How the animal used them is still argued about, see the section above.
Which parts of the Diplocaulus skeleton STL should I print first?
The three ribcage sections and the pelvis. They decide whether the finished skeleton sits level on its supports, so check them before you print the limbs and the tail. The middle ribcage section is also the one to test the fit of a 4 mm pin in.
How big a board do I need?
The board in my photos and in the manual is 1020 × 520 mm and at least 25 mm thick. The skeleton comes to about 30 mm from the front end, the back end and the front edge, so a smaller board will not hold it in this pose.
How do you paint a fossil skeleton like this?
A mid to dark brown base, a thin dark wash pulled into the crevices and a dry-brushed highlight on the ridges reads well on a fossil skeleton. The skull roof carries a pitted ornament, so fill the seams there sparingly and keep the pits open. Prime first, and keep the steel matt.
What file format is the Diplocaulus skeleton STL?
STL, one file per part, in millimetres. Every file carries its part number in the name, so the files and the manual always match. They are dense meshes, so give your slicer time and load the parts one at a time if it struggles.

Licence
The Diplocaulus skeleton STL is for personal use only. You can print it for yourself as often as you like. You may not resell or share the files, sell printed copies, or print it for other people as a service. Commercial licences are available on request. Instant digital download, nothing is shipped.


Reviews
There are no reviews yet.